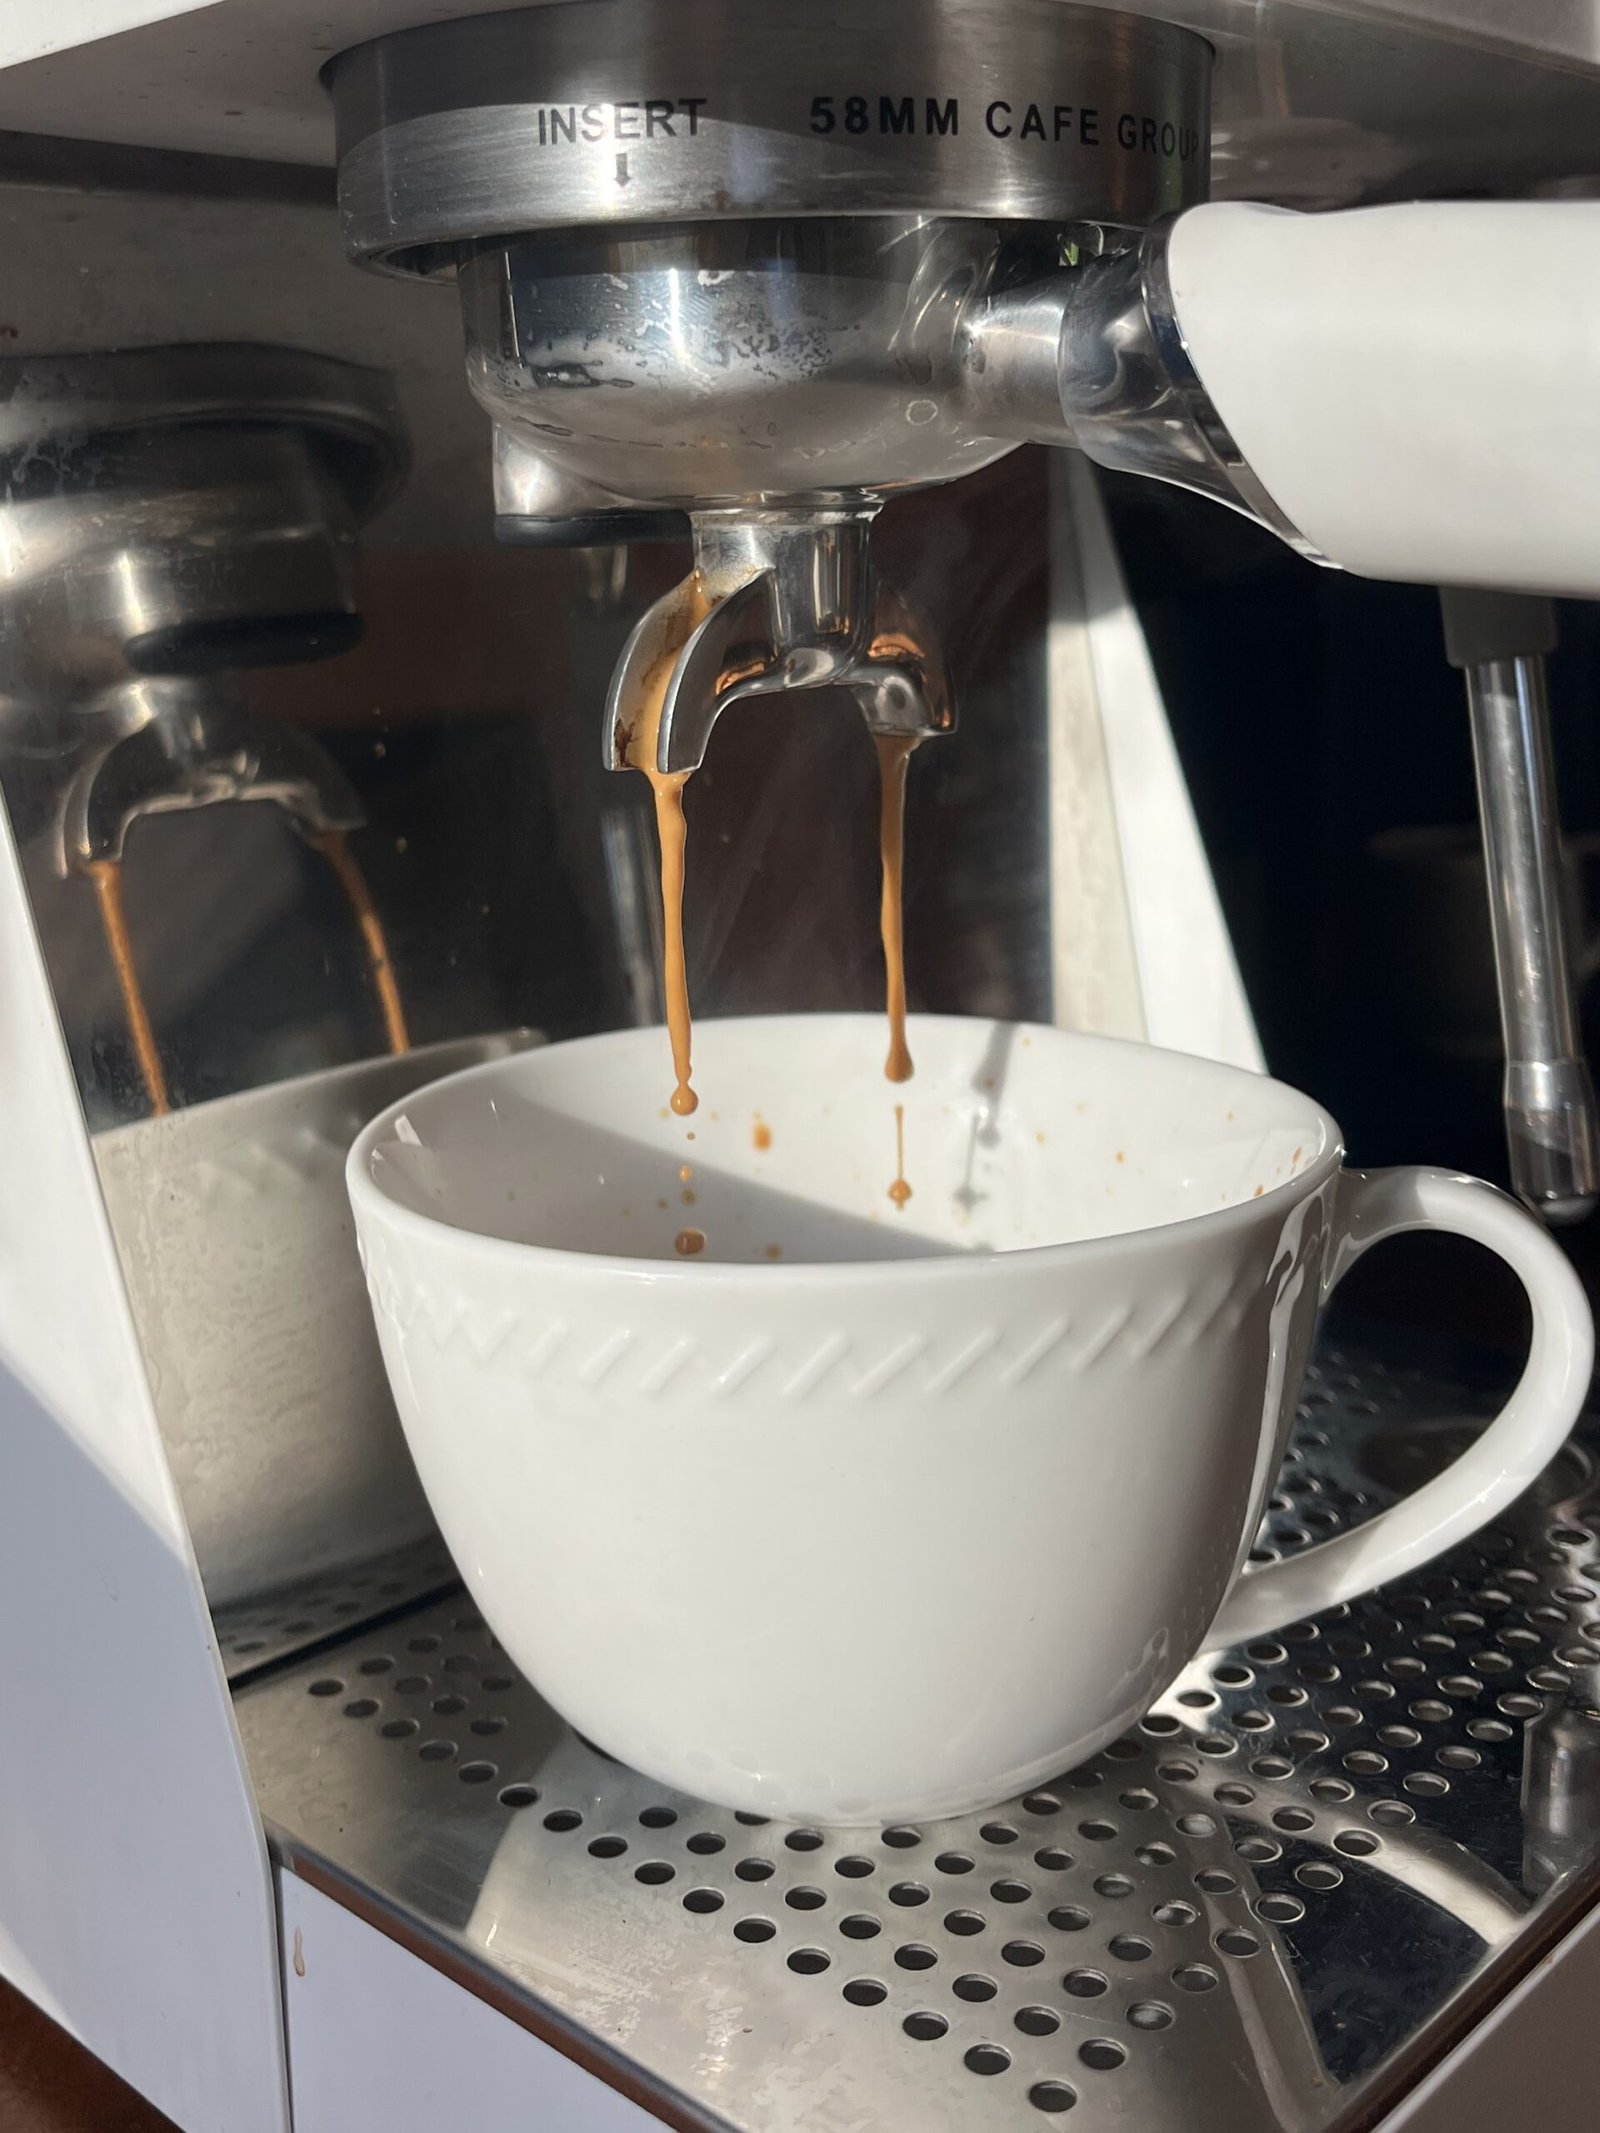
Let’s be honest. You bought the expensive espresso machine. You watched six YouTube tutorials at 2am. You poured with the confidence of someone who definitely knew what they were doing…
And you got a blob.
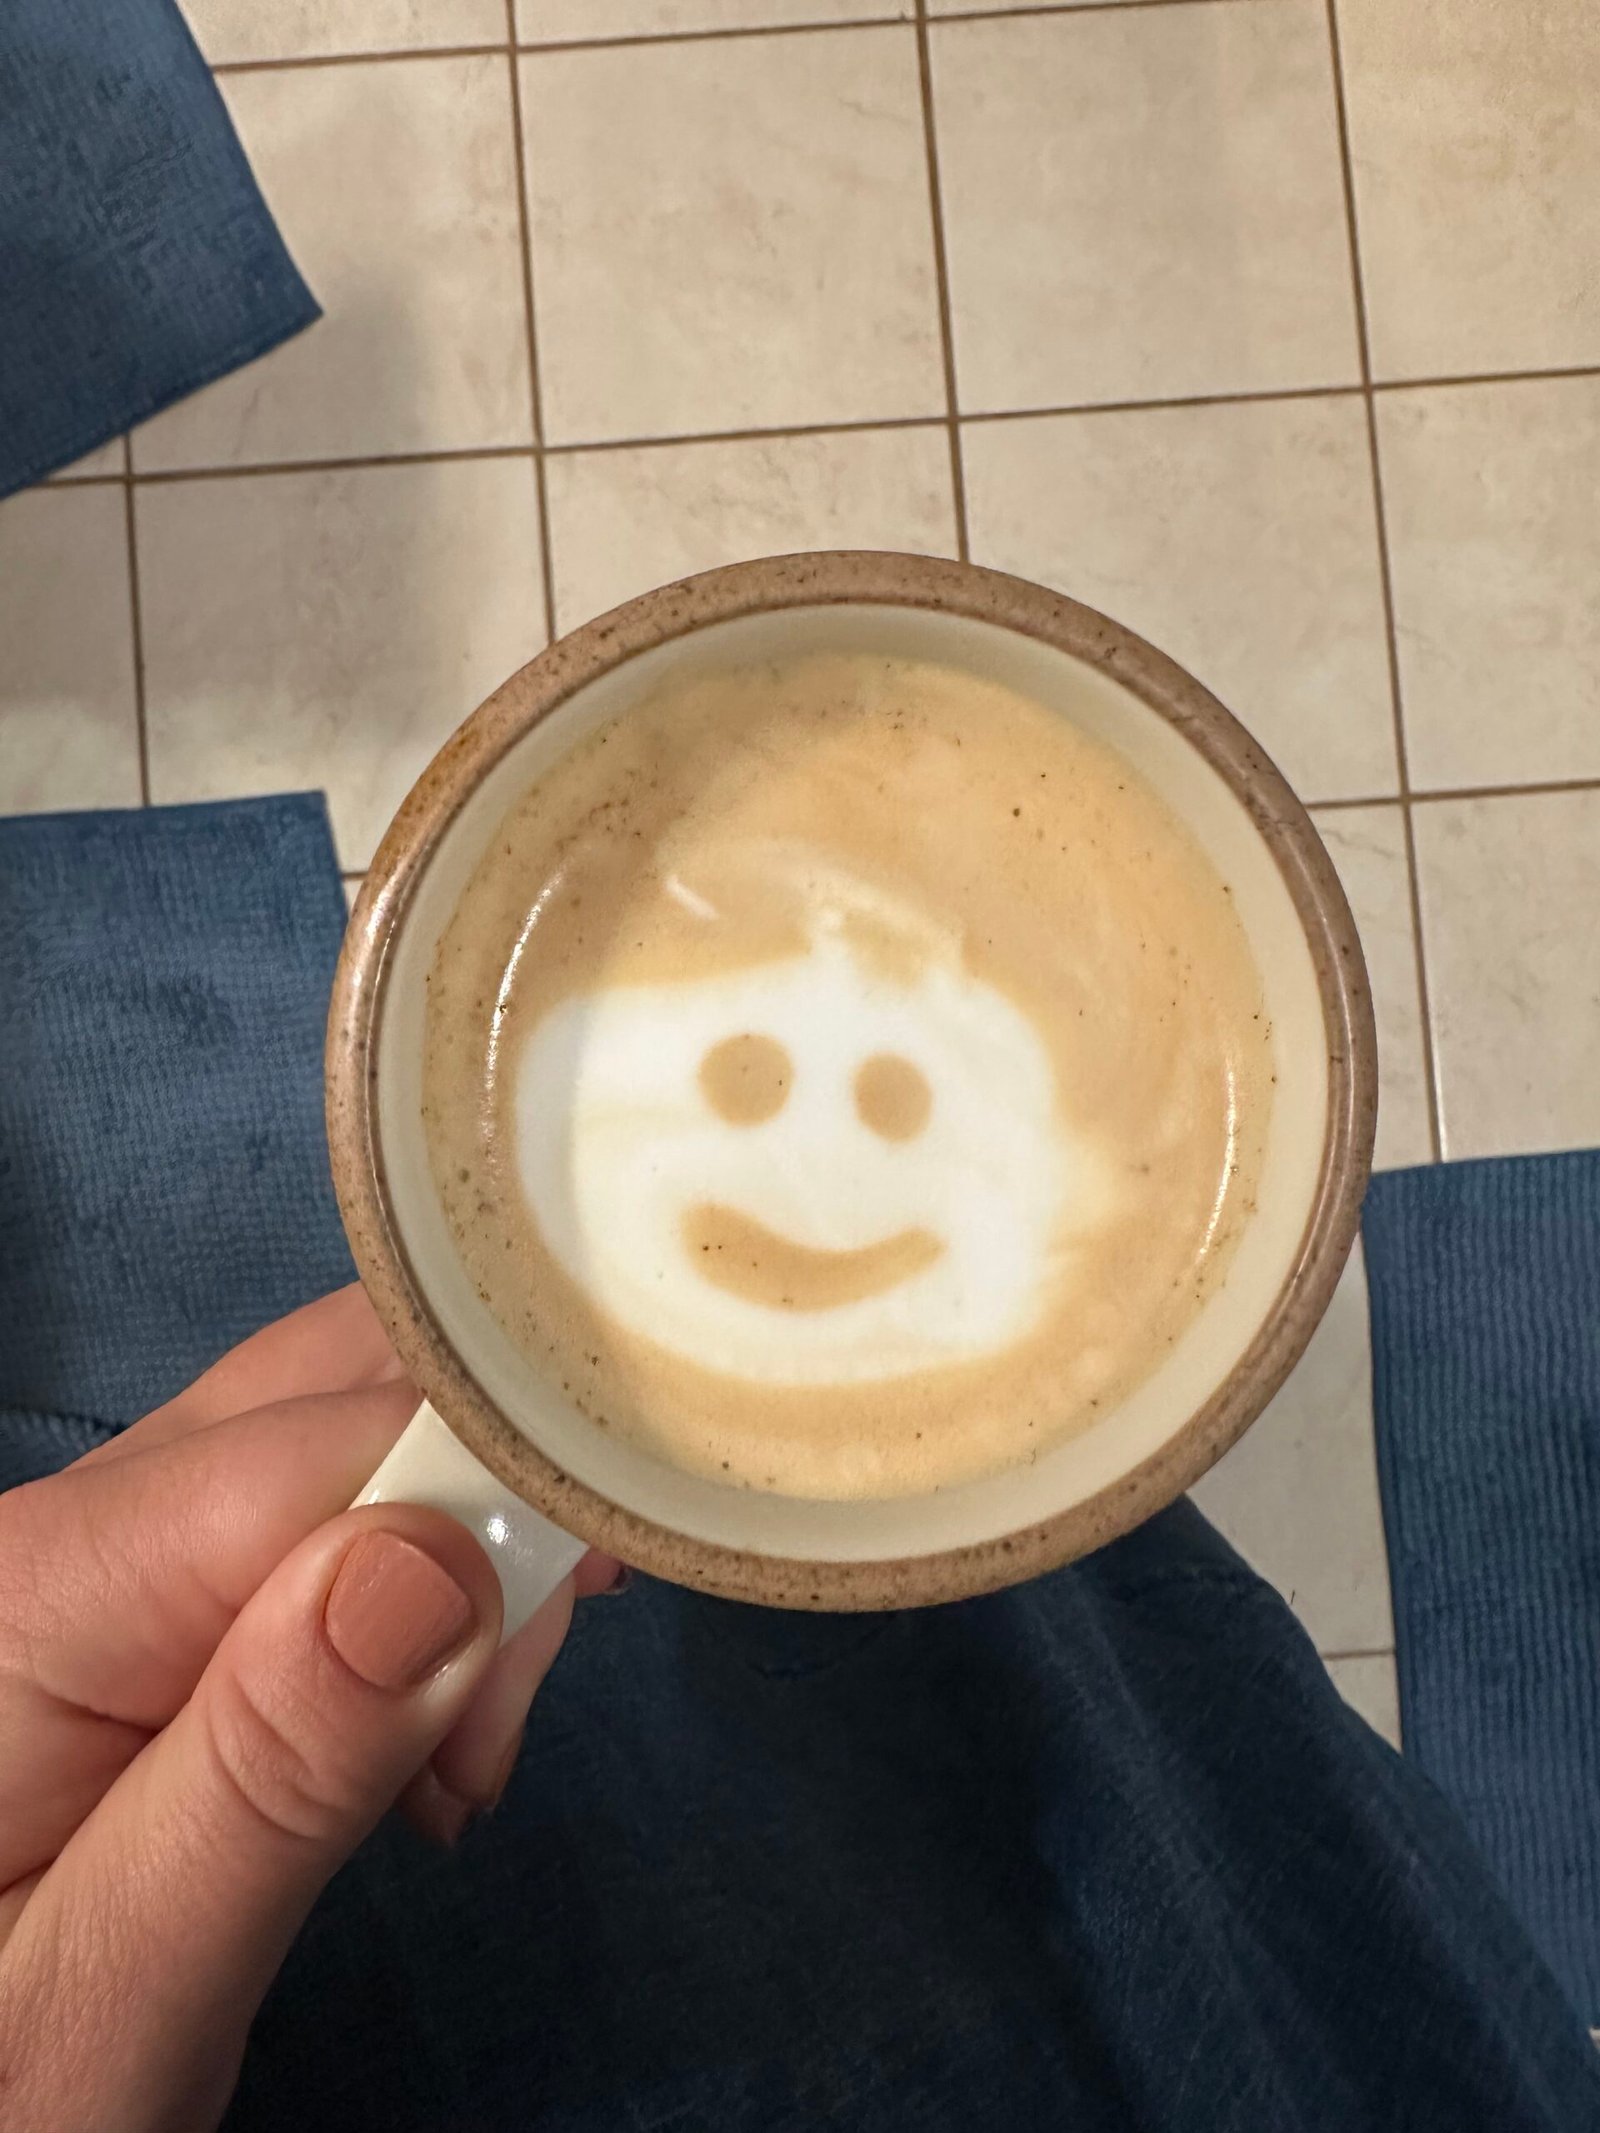
A sad, foamy blob that looked nothing like the little flower you were promised.
I’ve been there.
Multiple times.
Standing in my kitchen, staring at a cup that looked more like an abstract donkey than a tulip, wondering if latte art was just a myth designed to make the rest of us feel inadequate.
It is not a myth. It just takes a little technique, a little practice, and knowing what you are actually supposed to be doing with your wrist. Here is how to pour a tulip that actually looks like one.
what you need
Espresso
Espresso machine with a steam wand
Milk (highly recommend whole milk)
A pitcher with a narrow spout
A mug that is shaped like a bowl (a round/curved bottom is important!)
get your milk right first
Before you even think about pouring, your milk has to be right. You are aiming for the texture of wet paint, not shaving cream. If your milk is too stiff, nothing you do with your wrist is going to save the pour. A few tips:
Start with cold milk
Fill the pitcher no more than halfway, around 8-10oz. Milk expands as it steams, and it needs room to grow
Insert the steam wand tip so it skims the surface for the first few seconds to introduce air
Then submerge it fully, but still keep it just below the surface
Keep the milk angled so the steam wand creates a spinning vortex. Keep the milk spinning in the pitcher the whole time so the texture stays even instead of separating into foam on top and liquid underneath
Stop steaming 5-10 seconds after the pitcher gets too hot to touch on the sides
Tap and swirl the pitcher gently right before you pour to keep everything smooth and integrated instead of separated
Pour immediately so the milk doesn’t get a chance to settle
I do believe it’s easier to learn the art of steaming milk visually, so no worries if you feel overwhelmed after reading all of that.
James Hoffmann, a professional barista, made a thorough YouTube video on this process. This 20-minute video might be the key to unlocking latte art for the rest of your life, so I definitely recommend it 😉
Now onto the pour…
the pour, step by step
Hold your mug at a slight angle
Start high, start thin. Pour from a few inches above the cup. Only pour a thin stream of milk. (Analogy! –> Picture a water pitcher with ice in it–if you pour in a thin stream, then the ice won’t come with the water. Similarly, if you pour in a thin stream with the milk, the foam won’t come with it)
Drop down and get close. Once the cup is about half to 3/4 full, bring the pitcher spout close to the surface, almost touching it.
Pour first tulip stack. This is not a thin stream like the step above. (Analogy continued! –> pour some ice cubes out of the pitcher)
Move backward as you go. With each stack, move the pitcher slightly back toward the edge of the cup. Each pass creates one more petal, stacked on top of the last. I think aiming for three stacks to start.
Finish with the stem. On the last stack do not stop pouring. Instead, lift the pitcher slightly so it changes into a thin steam again and pour a thin line straight through the middle of the petals. This pulls everything together into the shape of a tulip.
the most important step:
Most people skip this.
Don’t be mindlessly attempting latte art over and over and over.
Each attempt, take time to notice what you did right, what you did wrong, and what you could do differently next time.
if it does not work the first time
It will not.
Mine did not.
Latte art is one of those things that looks like magic until you realize it is just muscle memory nobody warned you about. The difference between a blob and a tulip is usually the correct milk consistency and a whole bunch of practice.
So, be patient with yourself. Have fun! If you don’t get it right away, then allow your little abstract blobs to make you laugh and smile until your latte art practice starts to pay off.
Follow along on Instagram to see my latte art journey!
There are few things I love more than a good cup of coffee, and there are few things more disappointing than being somewhere without a decent way to make one.
That is exactly why portable coffee makers have become so interesting to me.
I love drinking coffee at home, but I also love a good adventure.
Whether I’m sitting on the porch, traveling, camping, staying in a hotel, or simply spending a morning somewhere without access to my espresso machine, having a way to make a real espresso drink can be a game changer.
And honestly, life is all about the little things.
This little machine is designed to let you make espresso without being tied to a traditional espresso machine or an electrical outlet. It can use either coffee grounds or coffee capsules, has a built-in rechargeable battery, and can even heat the water itself.
But does this portable espresso machine actually make good espresso?
And more importantly, is it worth the price?
After spending time using the Citaly GO-1, here is my honest review…
A quick disclaimer before we get started
The Citaly GO-1 was provided to me by Wirsh for review. That means I did not purchase the machine myself, but this review reflects my genuine experience with the product. Wirsh did not determine what I would say in this review, and I am sharing both the things I really love about the machine and the things I think you should know before buying it.
The Coffee Collect is reader supported. When you purchase through links on our site, we may earn an affiliate commission—at no extra cost to you. Thank you for supporting this little coffee dream of mine <3
Now, let’s get into the coffee…
What is the Citaly GO-1?
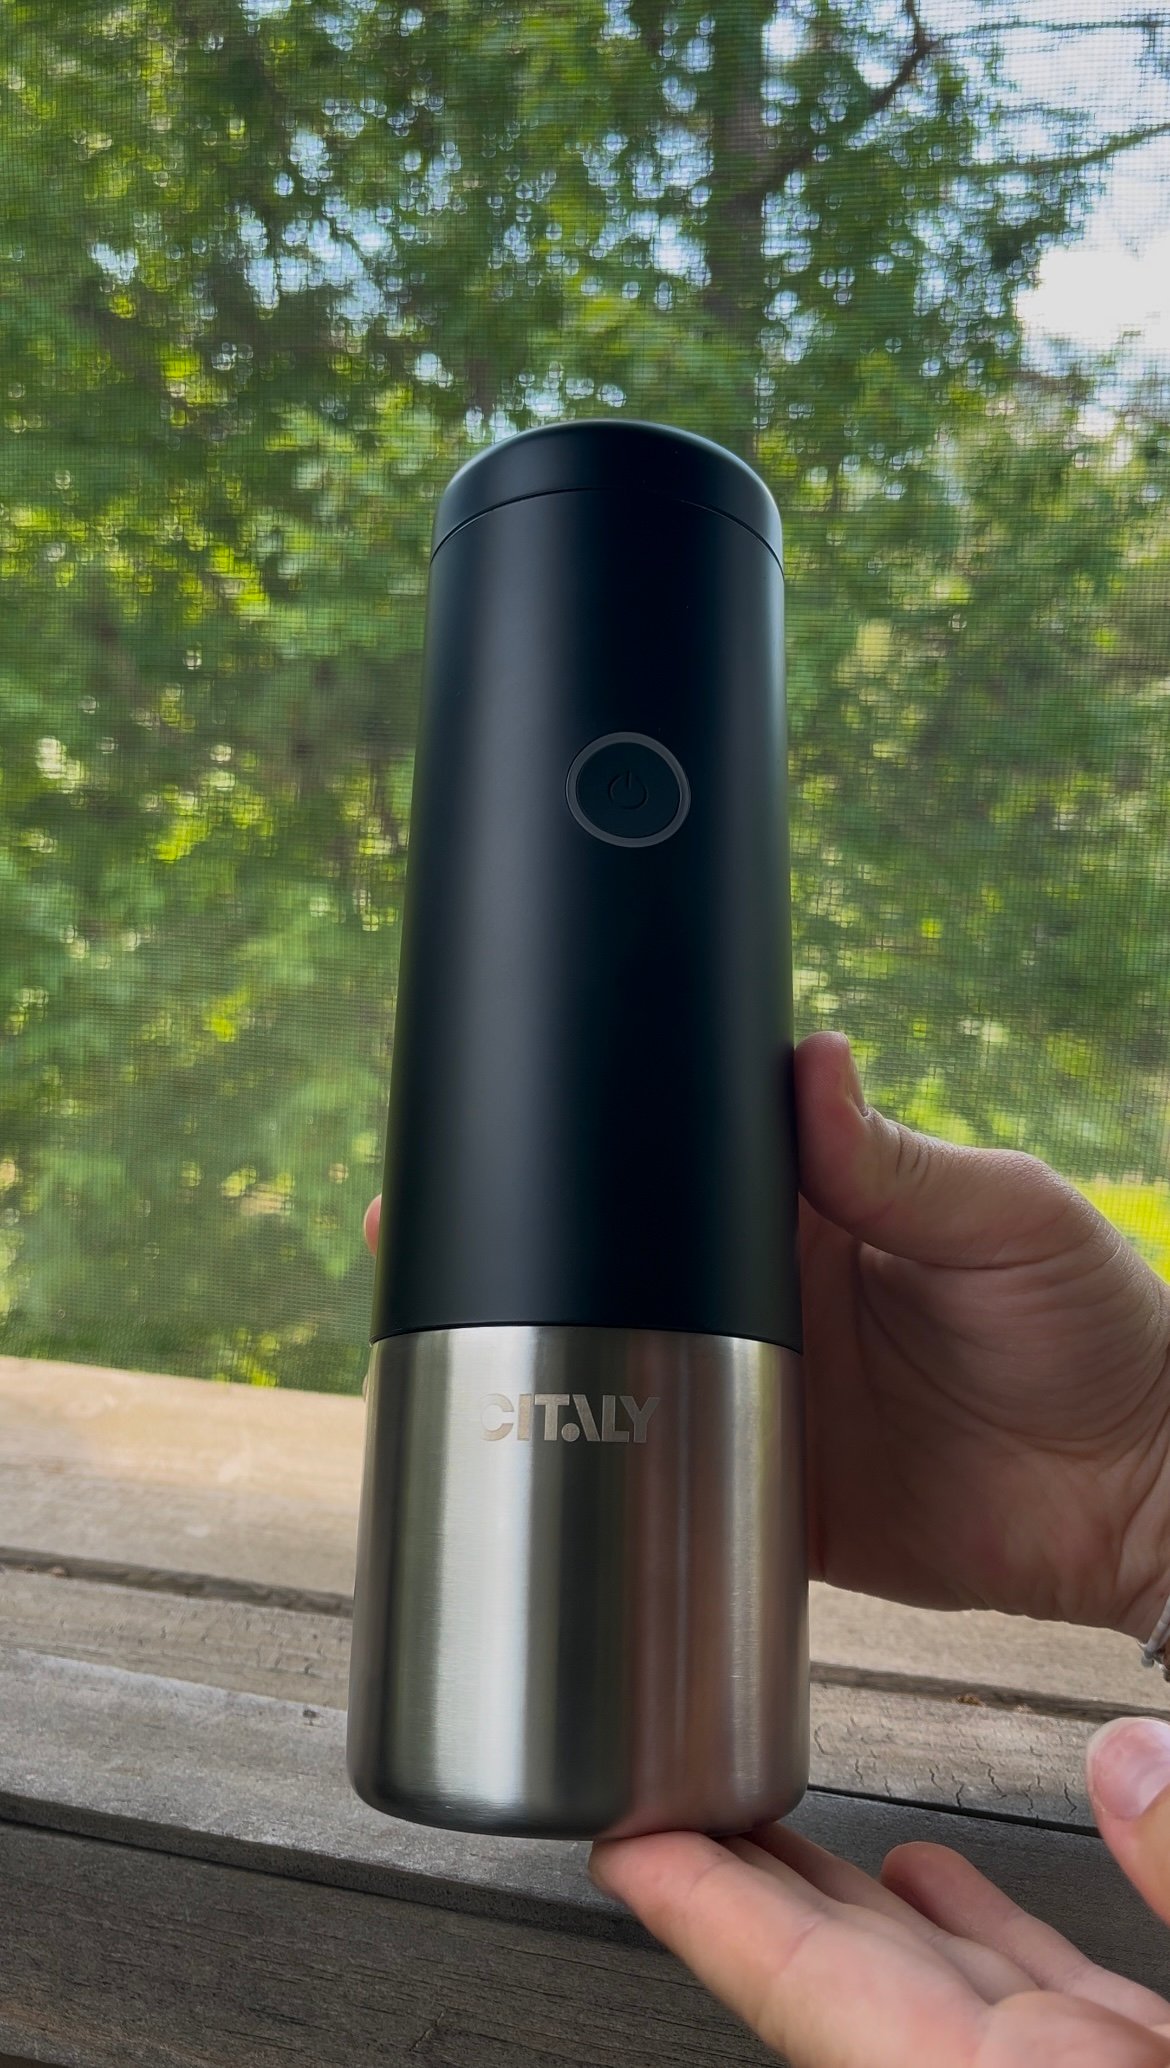
The Citaly GO-1 is a portable, battery-powered espresso machine designed for making espresso when you don’t have access to a traditional espresso machine.
Unlike some portable espresso makers that require you to heat water separately, the GO-1 has a built-in heating system. That means you can add cold water, turn on the machine, and let it heat the water before brewing.
The machine can heat cold water and brew espresso in approximately 3–4 minutes. If you already have hot water, brewing is significantly faster.
It also gives you two different ways to make your coffee:
Ground coffee
Nespresso Original Line-compatible capsules
And it also gives you two different brewing modes:
Espresso Extraction
Cold Brew Extraction
That flexibility is one of the things I think makes this machine particularly appealing for travel.
You can bring your favorite beans and grind them fresh using a portable grinder, or you can throw a few capsules into your bag when you want something extremely simple.
My first impression
The first thing I noticed about the Citaly GO-1 is just how compact it is.
It has a tall, narrow design rather than looking like a miniature traditional espresso machine. Wirsh lists the dimensions at approximately 69mm × 224.5mm and the weight at about 760 grams. (Imagine one of those thermal water bottles designed to fit in all cupholders/backpack side pockets)
The entire point is portability.
I can see this being particularly useful for someone who travels frequently, goes camping or RVing, spends time at a lake or cabin, or simply wants to have espresso available somewhere that doesn’t have a coffee setup, such as an office.
For me, one of the biggest appeals was being able to take my espresso routine with me when I go camping. I also really enjoy going out and watching sunrises with a coffee in hand, and this allows me to make coffee during the sunrise which is super-duper cool.
All in all, this machine simply gives you lots of freedom.
How does the Citaly GO-1 work?
The basic process is surprisingly simple.
You add your coffee grounds or capsule, add your water, turn the machine on by clicking one button, and let it do its thing.
The machine has a built-in rechargeable battery, so you aren’t required to plug it into an outlet while brewing.
Cold water vs. hot water
If you’re using cold water, the machine heats the water before extraction.
If you’re using hot water, you can skip that heating process and get your espresso much more quickly.
That distinction is important.
If you’re traveling somewhere where you don’t have access to hot water, the self-heating feature is a huge part of what makes the Citaly GO-1 useful.
But if you’re at home or somewhere with a kettle, coffee maker, microwave, etc., using hot water is much faster.
So I wouldn’t necessarily think of the self-heating feature as the fastest possible way to make espresso.
I’d think of it as the feature that gives you freedom from needing another appliance.
And that is a pretty big deal when you’re traveling.
Cold Brew Mode
The Citaly GO-1 has a cold brew mode that can be activated with cold water (below 50°C) by double-pressing the button.
Cold brew extraction takes longer than espresso extraction, but the result is a nice, smooth, and less bitter coffee.
Speaking from experience, it tastes amazing when brewed over ice on a hot summer day.
How does the coffee taste?
This is probably the most important question.
Because honestly, I don’t care how portable an espresso machine is if the coffee tastes terrible.
The Citaly GO-1 produces a legitimate espresso-style extraction with a layer of crema, and I was pleasantly surprised by the overall result.
I made an instagram reel using the Citaly GO-1 and even some of my followers commented on how surprised they were by how impressive the extraction was.
That said, I think it’s important to have realistic expectations.
This is a portable espresso machine, not a full-size espresso machine with a commercial grinder, 58mm portafilter, adjustable pressure, temperature controls, and a steam wand.
If you are someone who loves dialing in espresso shots and adjusting every variable of the extraction, this isn’t going to give you the same experience as your countertop setup.
But if your goal is:
“I want a good espresso shot when I’m away from home.”
That’s where this machine makes a lot more sense.
And for that purpose, I think it does an impressive job.
Ground coffee vs. capsules
One of my favorite things about the Citaly GO-1 is that you aren’t locked into one brewing method.
The machine can use Nespresso Original Line-compatible capsules as well as ground coffee. Wirsh specifically notes that it is not compatible with Nespresso Vertuo or Dolce Gusto capsules, so keep that in mind.
Using coffee grounds
If you’re like me, the ground coffee option is probably going to be your favorite.
You can use freshly ground coffee from your favorite roaster and have much more control over what you’re drinking.
The machine includes a reusable stainless-steel filter basket designed specifically for ground coffee.
The obvious downside is that grounds require a little more work.
You need to have coffee available, grind it ahead of time or bring a portable grinder, dose it into the basket, and clean the basket afterward.
But personally, I think that’s worth it if you’re trying to get the best cup possible.
Using capsules
Capsules are where the convenience factor really shines.
If you’re going on a trip and don’t want to bring a grinder or worry about measuring coffee, you can simply pack a handful of capsules.
Pop one in, brew, and you’re done.
For travel, I think this is probably the easiest way to use the machine.
This might sound obvious, but portability is the entire reason you would buy this machine—and I think the Citaly does a good job of delivering on that promise.
It is small enough to put in a backpack, suitcase, or travel bag without taking up a ridiculous amount of space.
It also doesn’t require you to find an outlet just to make your coffee.
That is a huge advantage over traditional espresso machines.
2. The built-in heating is incredibly convenient
This is probably my favorite feature.
You don’t necessarily need to carry around a kettle or find somewhere to heat water.
You can add cold water and let the machine do the heating for you.
It takes approximately 3–4 minutes to heat cold water to brewing temperature.
That isn’t instantaneous, but considering that you’re heating the water and brewing the espresso from a battery-powered portable machine, I think it’s pretty impressive.
3. You have the choice between grounds and capsules
I really appreciate having both options.
There are mornings when I want to use my own coffee, and there are situations where I want the absolute easiest option possible.
The Citaly gives you both.
4. The stainless-steel cup is a nice touch
The machine uses a double-walled SUS316 stainless-steel cup rather than relying entirely on plastic for the coffee receptacle.
It feels much nicer than some of the flimsy plastic cups I’ve seen included with portable coffee makers.
5. It’s fun!
This might sound like a silly thing to include in a product review, but it matters.
There is something genuinely fun about making an espresso with a machine this small.
It turns “I’m going to make coffee” into a little experience.
And if you’re a coffee person, you probably understand exactly what I mean.
No product is completely perfect
Now for the part I think is especially important in a product review.
No product is perfect, and I don’t want this review to pretend that it is.
1. It isn’t going to replace your home espresso machine
This is the biggest thing I would want a potential buyer to understand.
If you’re looking for a machine to replace your traditional espresso setup, this isn’t it.
You don’t get the same level of control over extraction that you get with a full-size espresso machine.
There is no steam wand, no large portafilter, no built-in grinder, and no ability to fine-tune your espresso in the same way you can with a traditional setup.
The Citaly GO-1 is best viewed as a travel companion, not a replacement for your home espresso machine.
2. The water capacity is on the smaller side
The maximum water capacity is around 50mL.
That makes sense for a portable espresso machine, but it does mean you have the maximum capacity to make a little less than two full espresso shots at a time rather than a large cup of coffee.
If you’re hoping to press one button and have a 12-ounce iced latte ready to drink, you’re going to have to do a little more work.
Personally, I think this is a reasonable trade-off for the size of the machine—but it’s something you should know before purchasing.
3. There is still some cleanup involved
Portable doesn’t mean maintenance-free.
The parts are detachable and rinseable, which makes cleaning relatively straightforward.
But if you’re using ground coffee, you still have a coffee basket to empty and rinse.
That’s not a dealbreaker for me, but if your ideal travel coffee routine is “make coffee and don’t clean anything,” capsules will definitely be the easier option.
4. Battery Life Requires Attentiveness and Planning
Like any portable device, you’ll also need to pay attention to the battery level and remember to charge it before heading out.
How many shots can it make?
This is one area where I would pay attention to how you’re using the machine.
Wirsh states that the machine can make approximately 3–4 cups when using the full heating cycle with cold water, while hot-water brewing allows for significantly more shots because the battery isn’t being used to heat the water.
For me, this reinforces what I think is the ideal use case:
One or two people who want espresso while traveling.
If you’re trying to make espresso for an entire group of people every morning using cold water, you’re probably going to find yourself reaching the battery limitations pretty quickly.
You only drink drip coffee or large cups of coffee.
My overall verdict
After using the Citaly GO-1, I think the most important thing to understand is that its biggest strength isn’t that it is the best espresso machine ever made.
Its biggest strength is that it lets you have espresso almost anywhere.
And that is a pretty cool thing.
I would never choose this over my full-size espresso machine when I’m at home and have access to my entire coffee setup.
But that’s not the point.
If I’m traveling, camping, staying somewhere without an espresso machine, or sitting outside and want to make a real espresso drink without going back inside, suddenly this little machine becomes incredibly appealing.
The Citaly GO-1 takes something that normally requires a countertop, an electrical outlet, a grinder, and a fairly involved setup and shrinks it down into something you can throw in a bag.
For the coffee lover who refuses to settle for bad travel coffee, the Citaly GO-1 is definitely worth considering.
Because sometimes the best part of making coffee isn’t even the coffee.
It’s where you get to drink it.
Want to try the Citaly GO-1?
You can learn more about the Citaly GO-1 and check the current price directly from Wirsh by clicking the button below ↓
The Coffee Collect is reader supported. When you purchase through links on our site, we may earn an affiliate commission—at no extra cost to you. Your support helps us continue sharing coffee inspiration, tips, and discoveries with this community. Thank you for being a part of our coffee journey!
There are two types of college students.
The ones who willingly spend $7 every morning on an iced latte before class…
…and the ones who realize they can make an even better one in their dorm room.
Hi! My name is Annaliese, and I’m both a college student and a barista of over 3 years who loves everything about coffee. Over the past few years, I’ve spent countless hours making espresso behind the bar, testing home espresso machines, and building a coffee setup that fits inside a tiny dorm room.
One thing I’ve learned? You don’t need tons of space—or thousands of dollars—to enjoy incredible espresso at college.
If you’re moving into your freshman dorm, upgrading your apartment coffee bar, or finally tired of relying on dining hall coffee, this guide will help you find an espresso machine that fits your space, your budget, and your coffee goals.
Let’s find your perfect setup.
What Makes a Great Dorm Room Espresso Machine?
Dorm rooms come with unique challenges.
Counter space is limited. Storage is even more limited. And unless your roommate is also a coffee enthusiast, you’ll probably want something that’s easy to use and doesn’t take over the entire room.
When I’m recommending an espresso machine for college students, I look for a few things:
A compact footprint
Beginner-friendly operation
Easy cleanup
A removable water tank
Enough power to make real espresso—not just strong coffee
Reliability for everyday use
A price that makes sense for a college budget
If a machine checks all of those boxes, it’s worth considering.
Before You Buy: Check Your Dorm’s Appliance Policy
Every college has different rules.
Most schools allow coffee makers and dorm room espresso machines, but some have restrictions on appliance wattage or certain types of heating elements.
Before ordering a machine, take two minutes to check your residence hall handbook. It’s much better than discovering on move-in day that your dream coffee setup has to stay at home.
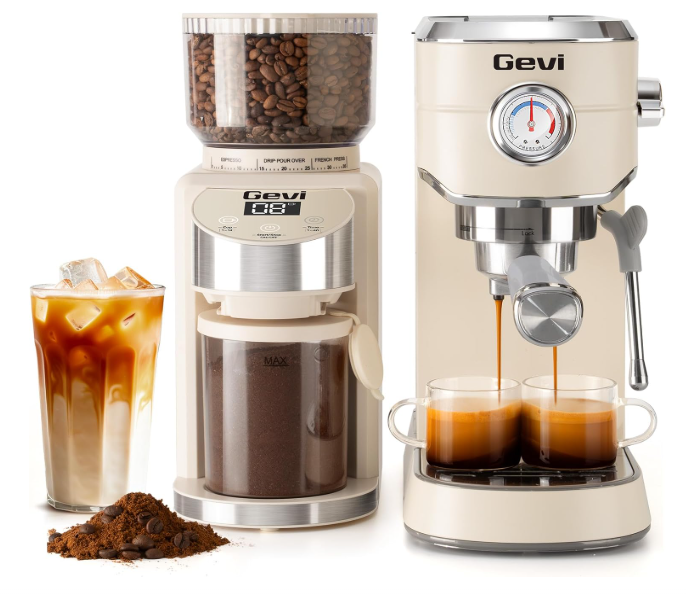
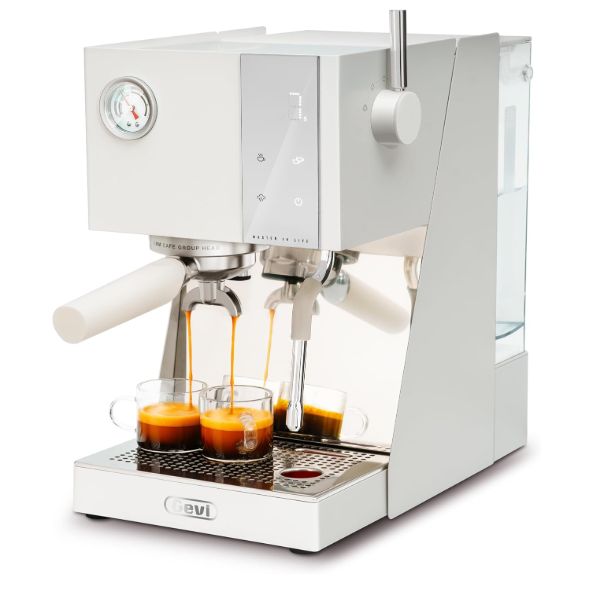
My Top Pick: Gevi 20 Bar Espresso Machine + Conical Burr Grinder
If I could recommend just one espresso setup for college students, this would be it.
After using several home espresso machines over the years, the Gevi 20 Bar Espresso Machine paired with its matching conical burr grinder has become my favorite recommendation.
As someone who works as a barista, I can honestly say that having a quality grinder makes just as much of a difference as having a quality espresso machine. The included grinder features 35 precise grind settings, which means you can actually dial in your espresso instead of settling for “good enough.”
A few reasons I love this setup:
Compact enough for a dorm room or apartment
Beautiful, modern design that doesn’t look bulky
20-bar pressure for rich espresso
Powerful steam wand for homemade lattes and cappuccinos
Removable water tank for easy refilling
Conical burr grinder that improves overall espresso quality
Easy enough for beginners while still giving you room to grow as a home barista
One of my favorite things about this machine is that it doesn’t feel like something you’ll outgrow after graduation. It’s a machine you can genuinely enjoy throughout college and continue using long afterward.
If you’re serious about making café-quality coffee at home, this would absolutely be my first recommendation.
Not everyone is ready to invest in a premium espresso setup—and that’s okay.
If your budget is closer to the $100–$150 range, there are several excellent beginner machines that can still make enjoyable espresso while helping you learn the basics.
Here’s a few I’d recommend:
atatix Espresso Machine: This is the first espresso machine I had in my dorm room. I loved how small it was and how easy it was to use. It also comes in a few different colors so you can match the aesthetic of your dorm room! Click HERE to shop!
CASABREWS 3700 Espresso Machine: Last I checked, this one was only $98 which is perfect for a college student’s budget! It’s compact, stylish, and would work perfectly in a dorm room setting! Click HERE to check it out!
Wirsh Home Barista Plus: This one is compact, easy to use, and reliable. It is also BPA-free which means you don’t have to worry about some unwanted plastics sneaking into your daily latte! You can also use my code COFFEECOLLECT30 to get an exclusive 15% off! Click HERE to shop!
Accessories That Make Your Dorm Coffee Bar Even Better
The espresso machine is only part of the equation.
A few small accessories can completely transform your daily coffee routine.
Handheld frother for mixing and making yummy cold foams! I’ll link my favorite one HERE
These aren’t all necessities, but they’ve definitely made my own dorm coffee setup feel more like a tiny official café 😉
Is an Espresso Machine Worth It in College?
Yes. Absolutely. 100%. Sí. Always.
(for me at least haha)
Let’s say you buy a latte before class four times each week.
At around $7 per drink, that’s roughly $28 every week.
Over a 15-week semester, that’s about $420.
By the end of the school year, you’ve likely spent well over $800 on coffee alone.
While buying an espresso machine is definitely an investment, it can quickly become one of those purchases that saves you money over time—especially if you’re already someone who loves specialty coffee.
And honestly? Saving money isn’t even the best part.
There’s something really special about making your own latte just the way you like it before an early class or inviting friends over for coffee and study dates.
It’s safe to say that some of my favorite college memories have definitely happened around my dorm room coffee bar.
Don’t buy the biggest espresso machine you can find or the most expensive one.
Buy the one you’ll actually enjoy using every day.
Your dorm room doesn’t need to look like a commercial café.
Start with a quality machine, a grinder, fresh coffee beans, and a willingness to learn.
You’ll improve with every shot you pull <3
Do I need a grinder?
(A frequently asked question)
It’s not necessary however I definitely recommend you do haha—a burr grinder is one of the best investments you can make. Freshly ground coffee makes a noticeable difference in espresso quality.
Here’s a few good burr grinders I’d recommend for a college dorm room:
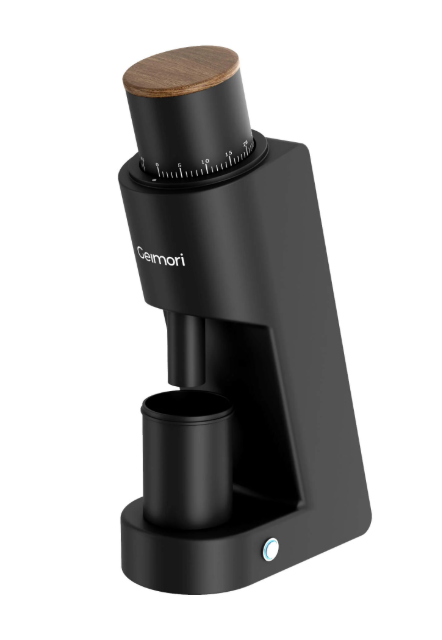
Geimori T38: Its little, its quiet, its battery powered, its portable… yeah, this one is great for a dorm room. Click HERE to check it out.
AAOBOSI Cordless Burr Coffee Grinder: This one is slightly bigger than the one above, but it is cordless and customers seem to be very happy with its performance. Click HERE to check it out.
CEVING Mini Manual Coffee Grinder: This one is low cost with high-quality results. Perfect for a college student’s budget! Click HERE to check it out.
Come Hang Out with Me on Instagram!
If you’re anything like me, coffee is about so much more than caffeine.
It’s slow mornings before class.
Hosting friends in your dorm.
Trying new recipes.
Learning new skills.
And creating little moments that make college feel a bit more like home.
If you’d like even more dorm coffee inspiration, homemade drink recipes, honest coffee gear reviews, and behind-the-scenes looks at my own college coffee setup, I’d love to have you join me over on Instagram at @the.coffee.collect.
That’s where I share my everyday coffee life as a college student, test new products, and hopefully inspire you to build a coffee setup you absolutely love.
I’d love to see you there!
Final Thoughts
Finding the right dorm room espresso machine isn’t about buying the most expensive setup—it’s about finding one that fits your lifestyle.
As both a college student and a barista, I know firsthand that great coffee doesn’t have to come from a coffee shop. With the right machine, and a little practice you can create drinks you’ll genuinely look forward to every single morning.
I hope this guide helps you find a machine that makes your college mornings just a little bit better <3
The Coffee Collect is reader supported. When you purchase through links on our site, I may earn an affiliate commission—at no extra cost to you. Your support helps me continue sharing coffee inspiration, tips, and discoveries with this community. Thank you for being a part of my coffee journey!
If you’ve been dreaming about creating your own dorm room coffee bar but aren’t sure where to start, you’re in the right place.
Hi! I’m Annaliese, a college student, coffee enthusiast, and barista with over three years of experience. Throughout college, I’ve built a coffee setup that fits in a dorm room without sacrificing the quality of the drinks I love. If you want to see my coffee setup in real life, you can follow along on my Instagram HERE. I also do little pop-up coffee shops in my dorm hall on campus!
If you’re tired of spending $8 on a latte before class, looking for a cozy study companion, or simply want to make your dorm feel a little more like home, creating a coffee bar is one of the best investments you can make during college.
This guide combines my experience as both a barista and a college student to walk you through everything you need—from choosing the right espresso machine and grinder to organizing your space and stocking your favorite flavors and accessories. I’ll also share a few tips I’ve learned from living with a coffee bar in a small dorm room, so you can avoid common mistakes and make the most of your setup!
Let’s build the dorm room coffee bar of your dreams—without breaking the bank (woohooo!)
Before You Buy Anything
Before you start shopping, take a few minutes to check your residence hall’s policies.
Some dorms have restrictions on certain appliances or maximum wattage limits. Others may require that appliances have an automatic shut-off feature. Every school is different, so it’s always worth checking your housing handbook before making any purchases.
You’ll also want to think about how much space you actually have.
Ask yourself:
How much countertop space is available?
Will your roommate also use the coffee bar?
Do you have room for a rolling cart or shelving?
Will you mostly make hot drinks, iced drinks, or both?
Do you have access to a fridge?
Planning ahead will help you choose equipment that fits both your space and your lifestyle.
Money-Saving Practices for Your Coffee Bar
A dorm coffee bar can absolutely be budget-friendly if you build it with intention.
One of the best ways to save money is to start small. You do not need to buy every accessory, syrup, and gadget all at once. Begin with the essentials and add to your setup over time as you figure out what you actually use.
Here are a few practices that can help keep costs down:
Buy used when possible. Espresso machines, carts, mugs, and organizers can often be found secondhand for much less than retail price (here’s your excuse to go thrifting or to shop on Facebook marketplace 😉 ).
Stick to a few syrups or flavorings you know you’ll use. It’s easy to get carried away with trendy flavors, but a small collection goes a looooong way. (Honey, Brown Sugar, Maple Syrup, Vanilla, Caramel, and Mocha are your best friends)
Use reusable cups and glasses (these can be thrifted too!). This cuts down on waste and saves money over time.
Share supplies with your roommate or friends if it makes sense. Things like sweeteners and coffee beans can be split to lower the cost.
Watch for student discounts, seasonal sales, and bundle deals. Coffee gear often goes on sale around holidays or back-to-school season.
Take advantage of your meal plan (if you are on one). Instead of buying milk, I filled up a small jug of milk at my dining hall every now and then and used that for my coffees.
The goal is to create a setup that feels enjoyable without turning into a financial burden 😉
Choosing the Right Coffee Maker
Your coffee maker is the centerpiece of your coffee bar, so it’s worth spending a little time deciding what fits your needs.
If you love lattes, cappuccinos, and other espresso-based drinks, an espresso machine is probably the best choice. I created a list of budget friendly dorm room espresso machines. Click HERE for the list.
If you like to keep things convenient and simple with drip coffee, the Mr. Coffee Mini Brew might make more sense.
There’s no single “right” choice. The best coffee maker is the one that fits your budget, your available space, and the types of drinks you enjoy most.
One of the biggest upgrades you can make to your coffee is grinding your beans fresh.
Whole beans stay fresh much longer than pre-ground coffee, and freshly ground coffee preserves more of the aromas and flavors that make each cup taste great.
If you’re purchasing a grinder, aburr grinder is truly worth the investment because it produces a much more consistent grind size.
I personally have two burr grinders and both are great for different purposes. They are…
The Geimori T38: I love this grinder because it’s high quality, extremely small, portable, and battery powered. It’s a single-dose grinder that allows me to have more control over my grind size and espresso quality. Check it out HERE.
The Homtone Burr Grinder: This one is perfect for when I’m in a rush or want to make multiple coffees in a row. It’s bigger than the Geimori T38 and requires an outlet, but it performs splendidly. Check it out HERE.
If a grinder isn’t in your budget yet, don’t worry. You can absolutely start with pre-ground coffee and upgrade later. Building your coffee bar is a process, not a race.
Stock Your Coffee Bar
Once you’ve picked out your brewing equipment, it’s time for the fun part.
Start with the basics:
Coffee beans–get whole coffee beans if you have a grinder, or get pre-ground espresso coffee if you don’t have a grinder. Try Knights Coffee and use my discount code THECOFFEECOLLECT for 10% off your entire order! 🙂
Milk of choice
Flavors–no need to buy all the fancy syrups if it’s not in your budget. Honey, brown sugar, and maple syrup are all low cost yet highly delicious!
Coffee mugs or iced coffee glasses (especially ones that you can take on-the-go!)
You don’t need dozens of syrups or every trending accessory right away. Start with the drinks you know you’ll actually make, then slowly build your collection over time.
Organizing Your Dorm Coffee Bar
Dorm rooms are small, but with a little creativity, you can build a coffee bar that’s both functional and aesthetically pleasing.
Use vertical space whenever possible. Small shelving units, risers, and rolling carts can dramatically increase your storage without taking up much additional floor space. I used a dresser for my coffee bar in my dorm room, but something like this 5 Tier Coffee Bar Station would also be just perfect.
One of the most important things is to make sure you have a power strip. Outlets can sometimes be scarce in dorms. The power strip I use is linked HERE.
A clean, organized coffee bar not only looks better but also makes your morning routine much smoother.
My Dorm Coffee Bar Setup
If you’re curious about the products I personally use every day, I’ll link a complete list of what I use for my dorm room coffee bar.
These are the products I’ve chosen after years of experimenting with different setups, and they’ve served me extremely well throughout college.
Once your coffee bar is complete, try experimenting with a few café favorites. Here are some of my favorites that require inexpensive flavorings.
Vanilla Latte
Teddy Graham Latte: Brown Sugar, Honey, Cinnamon Powder
Brown Sugar Shaken Espresso
Maple, Brown Sugar, Cinnamon Powder
Blondie: Caramel, Vanilla, White Chocolate
Make sure to check out @the.coffee.collect on Instagram for many more dorm room recipes!
Tips & Tricks for the Dorm Room Barista
Coffee creates community! Find some other coffee-lovers and invite them over for coffee! This is my favorite part. Hands down.
Don’t pour coffee grinds down the drain after you’ve used them. Plumbing isn’t the greatest in dorm rooms. Used coffee grinds go in the garbage.
Take care of your equipment!! Please! Make sure to do a simple cleanup at least once a week and then perform a deep clean at least once a month.
Be patient! Sometimes it takes a while to figure out the whole “home barista” thing. Make sure to experiment and make small adjustments until you find your perfect coffee.
Set clear boundaries with your roommates to avoid conflict from the start. Can they use your coffee bar? Will they be expected to help cover the cost of things like beans, milk, and flavors? How should they clean it after they use it?
Some espresso machines and grinders make a little noise. Will you be brewing coffee in the same area your roomates will be sleeping?
Final Things…
Creating a dorm room coffee bar doesn’t mean buying the most expensive espresso machine or filling your shelves with every coffee gadget you can find.
Start with what fits your budget, make upgrades over time (if needed), and build a setup that works for your lifestyle.
College goes by quickly, and sometimes it’s the small routines—like making your favorite latte before an early class or inviting friends over for coffee—that become the memories you cherish most <3
I hope this guide helps you create a coffee bar you’ll love throughout your college years. And if you do build one, I’d absolutely love to see it!!! Tag me on Instagram so I can cheer you on and see your setup.
Please don’t hesitate to reach out to me if you need any more help or guidance!
An honest, unsponsored review of the Gevi Commercial Espresso Machine after real daily use, hosting, and pop-ups.
For the longest time, I was using a pretty cheap espresso machine. It got the job done… but just barely. The shots were inconsistent, the steam wand felt like a guessing game, it overheated easily, and I always felt like I was missing out on what espresso could actually taste like.
So I started looking for the best home espresso machine that didn’t break the bank—and quickly got overwhelmed.
There are so many espresso machines out there. Some looked amazing but were way out of my budget, and others didn’t seem like enough of a step up to justify the cost. I went back and forth for a while, trying to figure out what was actually worth it.
And then I found the Gevi Commercial Espresso Machine (20 Bar, Smart OPV, 58mm Portafilter)—and honestly, I haven’t looked back since.
Note: This post is not sponsored. I purchased and reviewed this machine on my own because I genuinely wanted an upgrade. Some links may be affiliate links, which means I may earn a small commission at no extra cost to you. I truly appreciate your support!
First Impressions: A Machine That Feels Like a Step Up
The first time I set this machine on the counter, it immediately felt like an upgrade. It has that clean, stainless steel look—but more importantly, it feels solid and intentional.
Want to see how I’ve been using the Gevi Commercial Espresso Machine? Visit my Instagram page linked below!
The 20-bar pressure system paired with the Smart OPV doesn’t just pull strong shots—it helps you find balance. I started playing around more with grind size and dose, and for the first time, I could actually taste the difference those small changes made, which added a whole new realm of excitement to my home barista journey.
The 58mm Portafilter: Where It Starts to Feel Like a Café
This was a big moment for me.
The 58mm portafilter is what you’ll find in many coffee shops, and having that at home changes everything. It gives you more control, and it makes the whole process feel more intentional and professional.
Milk Frothing: Small Wins That Feel Big
As always, the steam wand took a couple tries to get used to, but once I found the rhythm, it became part of my daily routine.
This machine comes with a digital display, which allows you to monitor how long it takes to froth the perfect milk. This allows you to become super consistent and also make informed tweaks and adjustments if needed.
I have found that it takes me about 60-75 seconds to steam the perfect milk for a double shot latte. While it’s not the strongest steam wand out there, it still gets the job done wonderfully.
There’s something really satisfying about getting your milk just right so that you can start pouring some really awesome latte art.
One thing that really mattered to me—especially because I love hosting people and even doing small coffee shop pop-ups on my college campus—was durability.
My old machine couldn’t keep up. After just a few shots in a row, it would overheat and slow everything down, which made it stressful anytime I had multiple people waiting for drinks.
This machine has been a completely different experience.
I’ve been able to pull 30+ shots back-to-back without any overheating issues or drop in performance. Whether I’m making drinks for friends or setting up a little pop-up, it actually keeps up with demand—which makes the whole experience feel smooth and enjoyable instead of chaotic.
For me, that reliability is what really makes this feel like a true upgrade—not just in quality, but in what it allows me to do with coffee.
Other Things to Appreciate
There are a few smaller details that ended up making a big difference in my day-to-day experience with this machine.
Digital touch display: The interface is super simple and intuitive. It makes the whole process feel streamlined, and I love being able to monitor timing and make small adjustments without overthinking it.
Temperature control technology: This was something I didn’t fully appreciate until I started using it. The consistency from shot to shot is noticeably better, which makes dialing in your espresso so much easier.
Large water tank: If you’re making multiple drinks (especially when hosting or doing pop-ups), this matters more than you think. I’m not constantly refilling it, which keeps everything flowing smoothly.
Everything you need to get started: It comes with a tamper, a frothing pitcher, and four different baskets—single shot, double shot, and two dual-wall baskets. Whether you’re just starting out or experimenting more, it gives you options right away without needing to buy extra tools.
These are the kinds of features that might not be the main selling point—but they’re what make you appreciate the machine more every time you use it.
Who This Is For
If I had to describe it simply, this machine is for someone who wants more out of their coffee—but doesn’t want it to feel intimidating—both in terms of price and the learning curve
Upgrading your espresso machine can feel like a big decision—especially when there are so many options and price points out there.
But the Gevi Commercial Espresso Machine felt like the perfect middle ground for me. It’s a real upgrade without feeling out of reach, and it’s made my daily coffee routine something I genuinely look forward to.
If you’ve been in that same place—using a basic machine and wondering if it’s worth upgrading—I can confidently say this one is.
If you’re looking for a compact, single‑dose burr grinder that feels just a step below prosumer, the Geimori GU38 is one that quickly lands on your radar. On paper, it checks a lot of boxes: 38mm conical burrs, stepless grind adjustment, and a sleek, minimal footprint that looks beautiful on a home coffee bar.
After personally spending time unboxing, setting up, and dialing it in across multiple brew methods, here’s my review on how it actually performs in everyday use.
Transparency Note: Wirsh kindly sent me the Geimori GU38 to test and review. Below are my honest thoughts and I hope they can help in any way possible.
Unboxing & Setup
The unboxing experience is simple and straightforward. Inside the box, everything is securely packed with minimal excess packaging. The grinder itself feels high-quality the moment you lift it out — there’s a reassuring weight to it that immediately separates it from lighter, more plastic‑heavy entry‑level grinders.
Setup is refreshingly easy. There’s no complicated assembly required out of the box. Simply plug it in and you’re essentially ready to grind a perfect dose of coffee beans. For anyone upgrading from a blade grinder or pre‑ground coffee, this feels like a very approachable step into burr grinding.
Design & Build Quality
Visually, the GU38 is clean and modern. It comes in either a sleek black or polished white, and the wooden hopper lid adds a beautiful accent.
Its compact footprint makes it ideal for smaller kitchens or apartment coffee stations, and it doesn’t dominate counter space. The mostly metal construction gives it a premium feel without pushing it into a high-end price category.
The layout is simple and intuitive. There aren’t unnecessary buttons or digital screens — just a straightforward on/off operation and a grind adjustment collar. If you appreciate minimal, functional design, this grinder fits that aesthetic well.
One small design element worth mentioning is the power cord plug. While the grinder itself is sleek and compact, the plug feels disproportionately large compared to the machine’s streamlined footprint. This won’t be an issue for some, but if you’re working with limited outlet space or a crowded coffee station, that bulkier plug can slightly interrupt an otherwise clean setup.
One of the standout features is the stepless grind adjustment. Instead of being locked into preset clicks, you can make micro-adjustments to dial in your grind size exactly where you want it.
In practice, this is especially helpful for dialing-in espresso. Small changes in grind size can make a big difference in shot time and extraction, and the GU38 gives you the control needed to fine‑tune. It also transitions well into coarser settings for pour‑over, AeroPress, and French press.
The range is versatile enough for someone who likes to rotate between brew methods without owning multiple grinders.
Noise, Retention & Cleanliness
When I made a friend a coffee recently, she immediately commented on how much quieter the GU38 was than the grinder she uses at home.
Noise-wise, the GU38 performs well for its size and motor power.
It’s not silent (no electric burr grinder truly is), but it’s not harsh or high‑pitched, so early morning grinding won’t feel aggressive or disruptive.
Retention is relatively low when everything is flowing properly. Most of your dose makes it through the burrs cleanly, and the interior doesn’t seem to trap excessive grounds during normal use. Cleanup is simple: a quick brush around the chute and occasional deeper clean keeps things tidy.
That said, retention and flow are closely connected with this grinder. While it’s designed for single dosing, bean movement through the hopper isn’t always perfectly smooth.
When beans feed properly, grind consistency is solid for the price point. Espresso shots can be dialed in with some patience, and pour‑over grinds come out relatively uniform.
However, my biggest critique about the GU38 is that part of the dose can sometimes get stuck in the hopper and doesn’t always feed cleanly into the burrs. You may find yourself tapping or nudging the hopper to keep everything moving.
It’s not a dealbreaker — but it does interrupt the workflow more often than I’d like and is worth mentioning.
Pros & Cons
Pros
Compact and attractive design
Solid build quality with metal components
Stepless grind adjustment for multiple brew methods
Relatively quiet motor for its category
Cons
Beans can stick in the hopper and require manual assistance
No automatic shut-off when grinding is complete
Bulky power cord plug
Where to Buy (Discount Code Included)
If you’re ready to upgrade your daily coffee routine, the GU38 is a simple way to improve consistency without overcomplicating your setup.
For a limited time, use code COFFEECOLLECT30 for an exclusive 15% off the GU38 and taste the difference in your cup.
The Geimori GU38 sits in an interesting middle ground. It looks premium, offers a flexible grind range, and performs well when everything is flowing properly. For someone upgrading from a basic blade grinder or entry-level burr grinder, it can feel like a big step up.
That said, a few workflow quirks keep it from feeling fully polished.
If you value compact design and flexibility and don’t mind a slightly more hands-on experience, the GU38 could work well in your setup. But if you’re looking for seamless, effortless operation every single morning, you may find yourself wishing for a few more refinements.